This post contains affiliate links, which means that if you click on one of the product links, I may receive compensation. I do not recommend products that I do not personally believe are beneficial to you my readers. For more information, please see my disclosure page. Thank you in advance.
So you have decided to start selling on Etsy?
Having your own shop is rewarding, exciting, and can be at times frustrating.
I have been selling on Etsy for 6+ years, in that time I have had 16,000+ sales.
I hope to help you in your journey in starting your shop, and ease some of the frustrations!
This is a big step for your future, I have set up this guide to help you get started.
Any questions? Add them in the comments below!
note: following the Etsy links will give you 40 free listings to start your shop
_______________________________________________________
First, you will need to register with Etsy .
(If you haven't already done so, please go back to Part 1, I will wait 🙂 )
_______________________________________________________
An important part of your business/shop is branding. You want to have a cohesive brand that is recognizable to your customers.
_______________________________________________________
You will need a Profile Picture, for your shop.
A lot of shops use a portrait of themselves for their profile picture. I recommend a good close up, you will want a well lit, preferably natural light picture. If you have extra money to have a professional take your picture that is great or you can use this guide.
You can also use your shop icon, which we will discuss next.
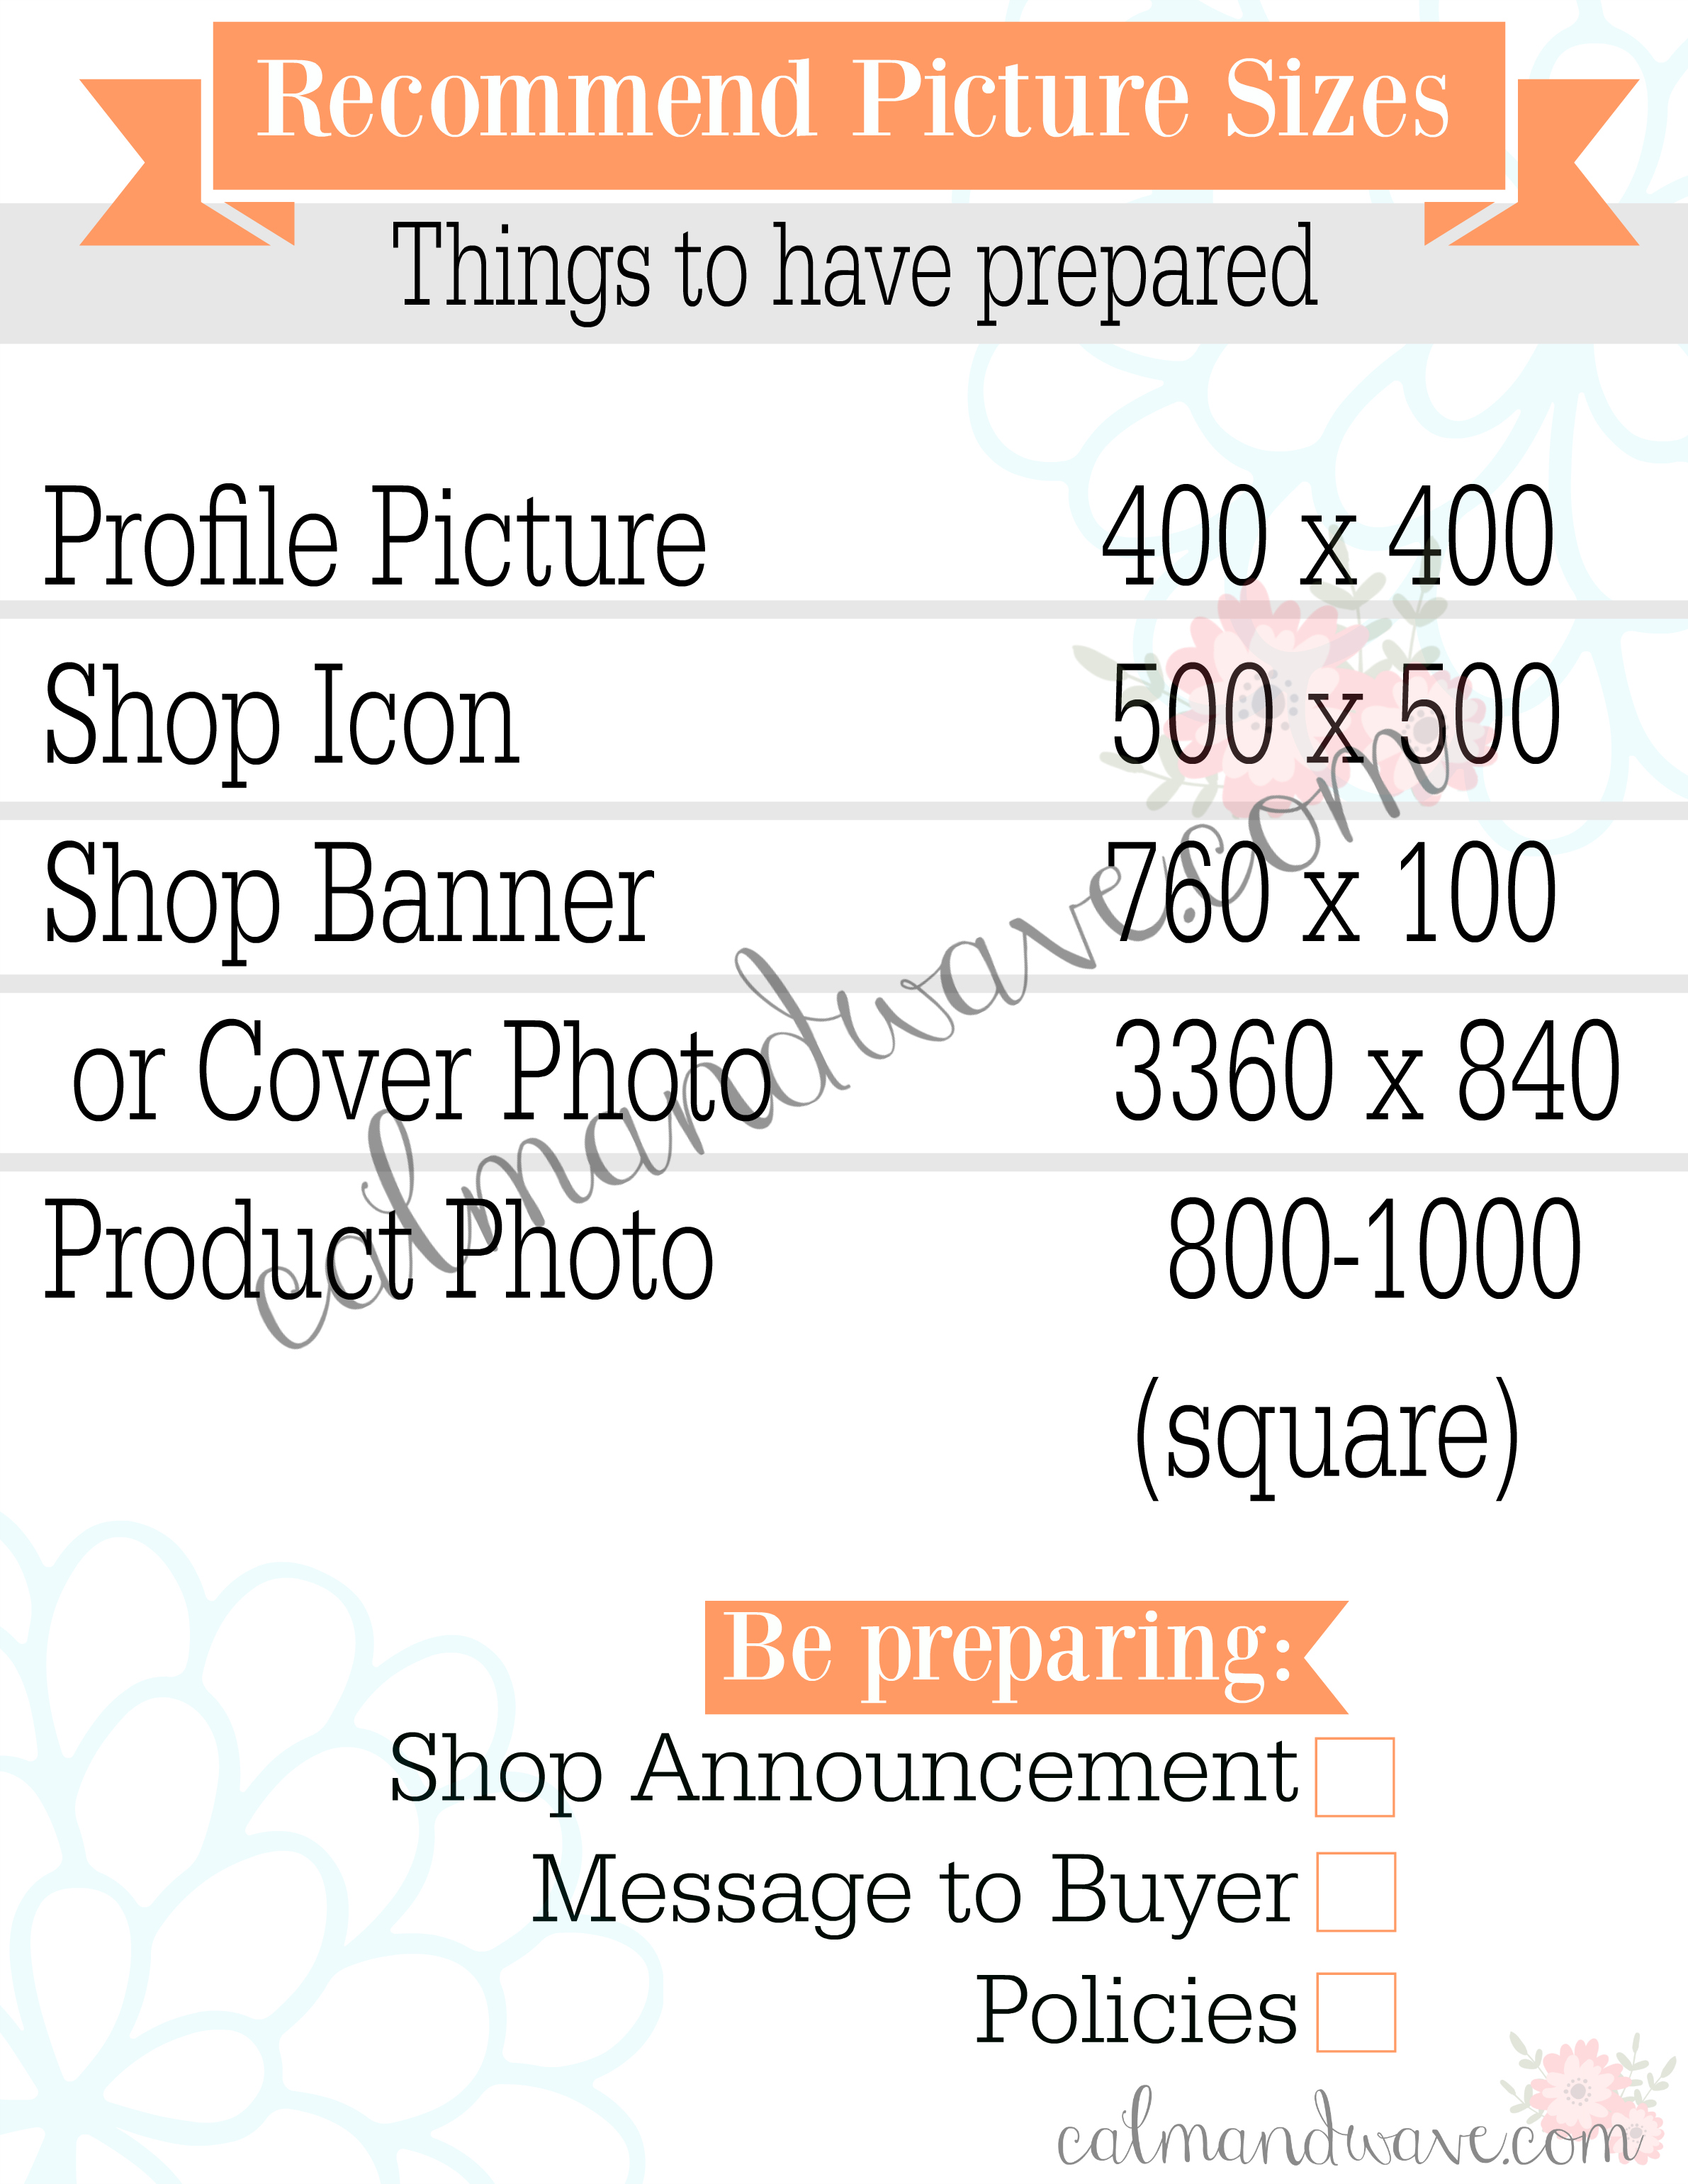
The suggested size for the Profile picture is 400 x 400 pixels.
_______________________________________________________
Your shop will need a Shop Icon.
Etsy has numerous people who sell branding packages. If you have it in your budget it would be worth it to look into a package.
If you do not, you can make one yourself!
I recommend taking the time to pick a color scheme for your shop. I recommend trying out this color scheme generator, it's free and easy to use. You can lock in colors that you want and it will randomly select colors to go with it.
I also suggest picking out a font or two to use throughout your brand. For Etsy, these will only be used on your pictures/logos/cover photo/etc. But it will help to make your brand cohesive.
Here is a great guide on pairing fonts.
Once you have your color scheme and fonts chosen. I recommend
I recommend using PicMonkey to make your Shop Icon.
You can choose to create your own design, you will want to set the size for the shop icon for 500 x 500 pixels.They have many different options for overlays, fonts, and colors.
In general, less is more in making your design.
_______________________________________________________
Up next is your Shop Banner or Cover Photo.
These both take up the upper part of your main shop page. The Shop Banner is smaller at 760 x 100 pixels and the Cover Photo suggested size is 3360 x 840.
I recommend using this to include your shop's name and a tagline if you have one.
You can use PicMonkey again to create this photo.
You will want to use the same color scheme and fonts that you chose for your Shop Icon.
_______________________________________________________
Last, but not least, is your product photos.
These are the most important pictures of them all. You need to have great product pictures for people to want to purchase your items.
For the pictures, I recommend taking the pictures during the day. Find the brightest part of your house, near windows, if possible. Find a background that you like and take several pictures at different angles of your products. Try to avoid over cluttering your picture and focus just on the product.
You will want close ups if you have an item that size needs to be shown make sure to include something for scale. Your customers can't hold, touch, or see the item first hand, they need these pictures to know what they are purchasing.
After you have your pictures head over to PicMonkey. You will want to crop these pictures to an 800-1000 pixel square.
I do recommend adjusting the exposure. Don't overdue the settings, just correct the image to show the product in the correct color and light.
It is also a great idea to add a watermark. You can create your watermark in PicMonkey as well. I will do a post on how to make the watermark, stay tuned!
Once, you have your watermark, you will need to go to to the overlay tab and select your watermark and then save!
_______________________________________________________
Download Worksheet Here
_______________________________________________________
Up next!
Be preparing, a shop announcement, a message to buyers, and be thinking about your policies.
_______________________________________________________
Up next we will talk about Shop Announcements, Message to Buyers, and Policies.
Any questions?
Post in the comments what questions you have about setting up your Etsy shop.
_______________________________________________________
If you like this post and want to see more please:
Follow us on Facebook.
Come pin with us on Pinterest.
Sign up for our newsletter.